Friday 26 September 2014

Christmas Antlers Mug Rug

Antlers on Cream
I've had one thing on my mind this week – Christmas Antlers!
https://www.flickr.com/photos/79143602@N04/15359303072/in/photostream/
Antlers on Green
This design has been in my sketchbook for nearly a year.  So this week I gave in to it and rustled up three seasonal mug rugs.
http://www.craftsy.com/pattern/quilting/home-decor/christmas-antlers-mug-rug/113926
A herd of Reindeer
I never knew rustling was so quick and easy.  The hardest part was choosing the fabric – but it always is, isn’t it?

The pattern is in my Craftsy shop if you fancy becoming a reindeer rustler yourself.

Monday 22 September 2014

Patchiqué Blocks 13 and 93

The Patchique Project - Quilt Layout 
When I started the Patchiqué project is was with a view to combining both patchwork and appliqué in one quilt.   What I didn’t expect to find however, was that I enjoy the patchwork more than the appliqué.  But I do.  I lose myself in the patchwork with each block taking about an hour at most (including cutting).  This week I created block 13 – Yottsu masu (translated as ‘four square measures’) and I really enjoyed myself. 
Block 13 from Japanese Taupe Quilts
This block begins with the stitching together of three one inch squares which gave me the impression it would be a fiddly morning. But I was wrong; once the initial centre square is completed the rest of the block is pure fun as you add courthouse steps.  Unfortunately I initially created block 13 without reference to my previous Patchiqué blocks and when it was done, I realised that it was too fussy and didn't quite fit in.  
A tad too busy for the Patchique quilt 
So I redid it.  But this was no hardship – it was just more playtime.

https://www.flickr.com/photos/79143602@N04/15319048222/in/photostream/
Patchique Block 13 - in true Patchsmith Style 
Once the patchwork was done, I moved onto appliqué block 93 – Hosoneji kiri guruma (‘elongated paulownia wheel'). 
Block 93 from Japanese Taupe Quilts
Quite straightforward appliqué – nothing much to report, aside from the leaves being back-to-front on account of my use of the quick-fuse appliqué method. 

https://www.flickr.com/photos/79143602@N04/15132793028/in/photostream/
Patchique Block 93 - Patchsmith Style 
The pattern called for stem stitch to link the small flowers to the center but I found it too heavy for the fabrics and changed it to a rustic running stitch. 
Much more Patchsmithian don't you think?.  Next fortnight will be the turn of blocks 46 and 113.  

Sew until then ........

Sunday 14 September 2014

Double Zippered Pouch for Zippaphobes

Sometimes a pattern comes along just at the right time and so it was with Amy’s Double Exposure Zippered Pouch – I had a morning free and wanted some fabric fun.

You most probably know already that Amy is my American sister.  As such it is my sisterly duty to try out any pattern she creates.  So, with much regret (cough-um-splutter) I passed on the housework in favour of being a dutiful sister and I set about choosing fabrics and ribbon.    
http://www.craftsy.com/pattern/sewing/accessory/double-exposure-zippered-pouch/108259?ext=craftlet-pattern
Amy's snazzy Double Zippered Pouch pattern
Now I am a mini quilt, mug-rug maker – inexperienced in zips, pouches and bags.  In fact I am something of a zippaphobe (yes, that is an actual word as I made it up to cover the fact that there isn't an actual technical term for somebody who is afraid of zips .... and remember, you heard it here first.)
But I wasn’t daunted for two very good reasons.   Firstly, I have come across Amy’s patterns before – her Anita tote pattern was the first pattern in our Across the Pond Sew Along. 
http://www.craftsy.com/pattern/sewing/accessory/sale---anita-vacation-tote-pdf-pattern/24738?ext=craftlet-pattern
My version of Amy's
Anita Tote Bag
It was this pattern that introduced me to Amy’s tutorial pattern style.  With lots of pictures and clear instructions the tutorial style is perfect when you are lacking experience and facing new techniques.  
The Anita Tote pattern
suitable for all you zippaphobes!

And secondly, Amy taught me how to sew a zip in the back of a cushion that is really easy yet looks professional.
http://eamylove.blogspot.co.uk/2012/11/free-tutorialpillow-backs-with-covered.html
My first zipped cushion back following
Amy's free tutorial

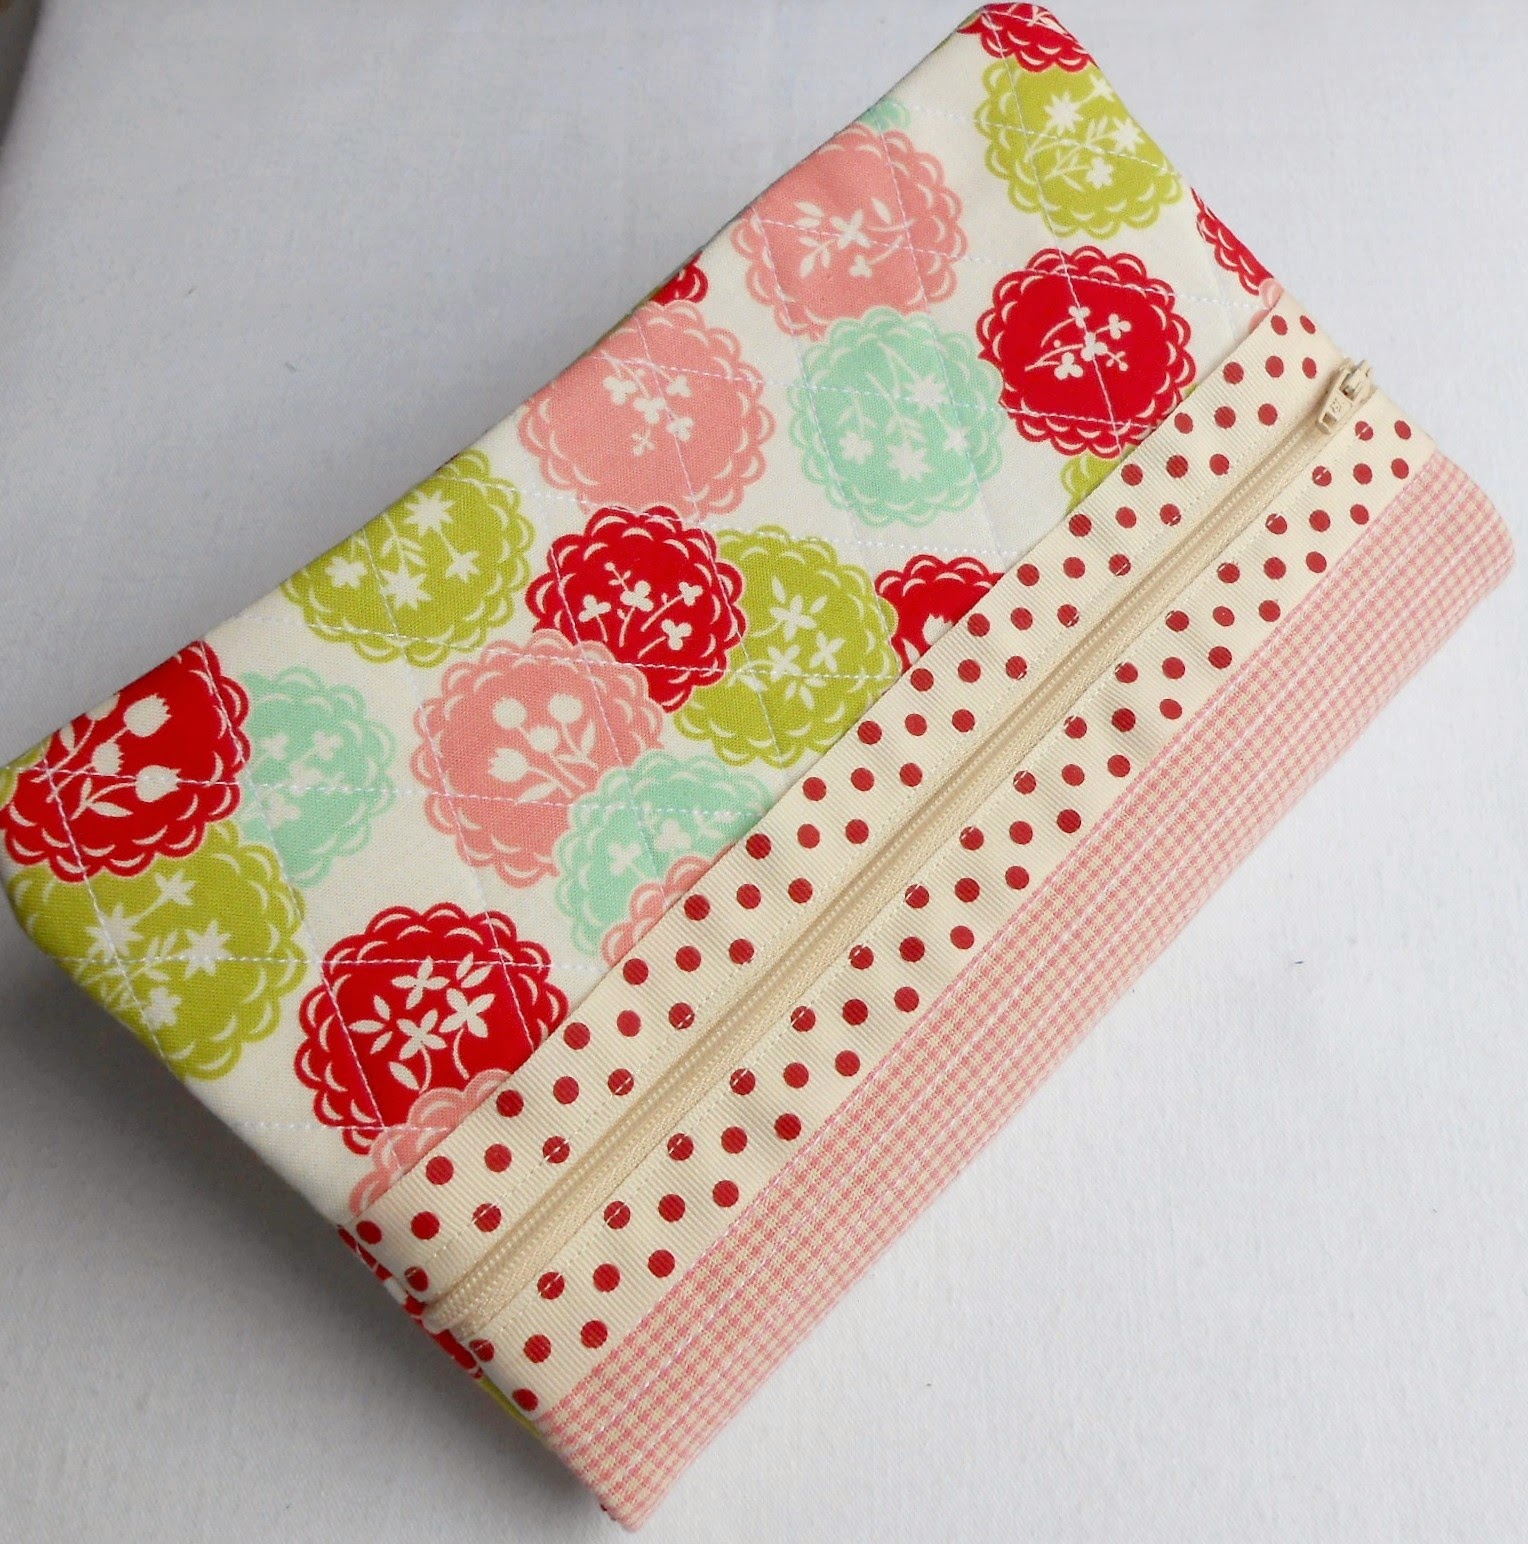
Therefore, the double zippered pouch seemed like a fun project especially as fabric and ribbon was involved.  And I wasn’t mistaken.  Things I particularly liked about this project:

1.         Quilting of the fabric – you do it before sewing it all together.  Quilting is so easy when you are dealing with flat rectangles of fabric and batting.  (You don’t have to quilt the fabric if you don’t want!)
2.         Adding the zips - this was simple as the zips lie on top of the fabric and not between the seams.  You don’t even need a zipper foot.
https://www.flickr.com/photos/79143602@N04/15052737088/in/photostream/

3.         Ribbon.  Who doesn’t like to play with ribbon?  In fact I couldn’t make up my mind – I got it down to two polka dot ribbons but couldn’t decide between them - so I used them both.
https://www.flickr.com/photos/79143602@N04/15052617720/in/photostream
4.         The opportunity to play with fabric, pattern and trim.  This makes it the perfect make-do project as you can use whatever you have to hand.  Which is a good thing because I got home from the zip shop to find I had purchased one ordinary cream zip and one cream dress zip.  What to do?  But the answer was in the pattern - Amy suggested using two different colour zips.  Replacing a cream zip with a turquoise one adds to the project and nobody will ever know I made a mistake (ssshhhhh, don’t tell).
My only complaint ...... this project didn’t take more than an hour which meant there was plenty of time left-over for HOUSEWORK (yuk, cough, splutter, urgh!).

Tuesday 9 September 2014

Patchiqué Blocks 45 and 70

https://www.flickr.com/groups/2445878@N22
The weather here in England has been glorious and I’ve been out and about cycling around the country.  But there has still been time to continue with my Patchiqué project.

Just like the last days of summer, my Patchique trail is also coming to an end and I find myself on the home-straight as I complete another two blocks.  Want to see the proposed layout for the whole quilt?  Of course you do.
Patchique Quilt Layout
(the blank squares are the last eight still to be completed)
 
This week I added patchwork block 45 ‘Komochi kume igeta’ (translated as ‘grouped well-curb whirlpool’). 
Block 45 from Japanese Taupe Quilts
The notes I've added to my book read “very easy – very nice”.  This block was a delight to make as it went together really easily. 
https://www.flickr.com/photos/79143602@N04/15188719375/in/photostream/
Patchique Block 45 - Patchsmith Style 
The block includes a part seam in the middle but this was simple to do as the book has clear instructions.  (One of the high points on this trail has been the piecing diagrams in the book – follow them exactly and all will be well.)

However, the appliqué block 70 ‘Shikishi’ (translated to ‘calligraphy cards’) didn't work out quite so well. 
Block 70 from Japanese Taupe Quilts
All appeared to be going well until I photographed my finished block and I noticed one of my little squares was out-of-alignment (bottom right-hand corner).  Do I redo it?  Do I heck as like (translated as ‘not a chance’).   
https://www.flickr.com/photos/79143602@N04/15165691806/
Patchique Block 70 - Patchsmith Style 
When placing your squares make sure that one whole side of the smaller square is covered completely by the larger square to its left (look at the placement diagram and you will understand what I mean).  The notes added to the book for this block, even before I noticed my mistake, read “boring - add stitching to central star”. 

Only eight more blocks to go which should take me to the end of October. Next fortnight will be the turn of Blocks 13 and 93. 

Sew until then ......

Monday 1 September 2014

Origami Fabric Butterflies from Across the Pond

Summer is drawing to a close and with it comes the end of the sights and sounds of summer.  But never fear - there is a way to keep hold of the beauty of summer all year round with this month's Across the Pond sew-along project – fabric origami butterflies. 
 
Creating these beautiful insects is very simple - all it requires is a couple of pieces of fabric, some folding and pressing and a few stitches to help the butterfly keep its shape.
 
I used the paper origami tutorial by Ralph Matthews.   
Large and Small Butterfly
Start with two fabric rectangles per butterfly.  For the large butterfly I cut two 6½” x 5” rectangles and for the smaller butterfly the rectangles measured 4½” x 3½”. 

With right sides together stitch the two rectangles together using a ¼” seam but leave a small gap in the middle of one of the long seams for turning.  Clip the corners and turn the rectangle right-side-out.  (A chopstick is very good for pushing the corners out.) You can either slip-stitch the opening closed or do as I have done and topstitch all the way around the rectangle, close to the edge.  Press.

From hereon it is simple – follow the origami instructions and press as you go along.  Once your butterfly is complete, stitch the wings together along the centre as indicated by the arrow:
A couple of stitches in the underside of the wings will help
the butterfly hold its shape

I added two short lengths of knotted ribbon to mimic antennae, stitching them in place with a couple of stitches. 

These colourful fabric embellishments are so much fun and they can be used in so many ways.  Pop over to Susie’s Sunroom to see how she used her butterflies and then pop over to Amy made That to see her stylish turquoise butterfly and some colourful butterfly projects. 

What did I do with mine?    The little one is a book-mark fitting neatly onto the corner of my current notebook ..... 
Butterfly Bookmark
... whilst the larger butterfly seems more at home amongst the flowers, as a plant stick.  This was easily achieved by inserting the blunt end of a cane skewer into the fold of the butterfly and stitching it in place.    (I am thinking this would make a lovely gift - especially if accompanied by a Butterfly Patch mug rug.)
Butterfly Plant Stick

You could even pop one into the corner pocket of my Butterfly Pocket Mug Rug:
Butterfly Pocket Mug Rug Pattern

Until next time ......